


Deploying a Web App to AWS and exposing it to the Internet


After reading ten of thousands of job posts, one thing was common: Knowing how to deploy a web app in a cloud.
I work with AWS resources for almost 3 years now, but I never fully deployed an app to AWS, the company always has someone fully responsible for doing so.
In this article, I'll share with you how I manage to do that using Cloudformation.
If you want to learn more about Cloudformation, take a look at what Rishabh Rawat wrote on his blog. You will definitely learn the concepts of CF really quickly.
The Node.js app
It is a simple server. Nothing else. The repository is available on my GitHub.
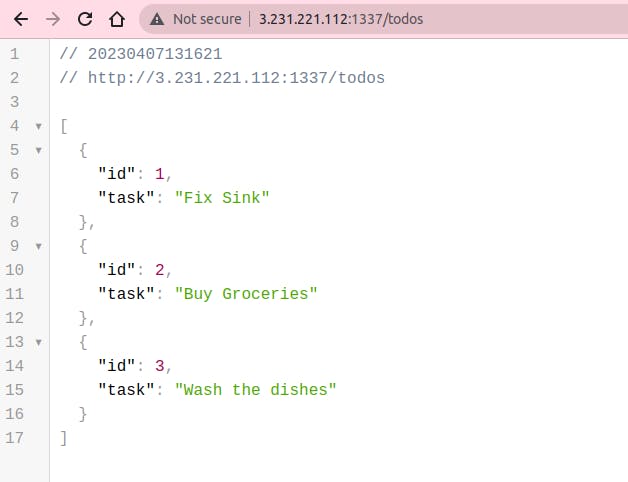
The app listens on port 1337 or if you provide a $PORT environment variable, it can listen on a different port.
It has two routes:
GET / => 'Hello World!'
GET /todos => a list of todos
The CloudFormation template
I'll split this section and 3 phases: Resources that are closer to our code, the network (very important), and deployment.
Resource closer to our code
The machine that will run our code: AWS EC2 Instance
In short, AWS EC2 is a virtual server that AWS provides. EC2 instances can be used for a wide range of purposes, such as running applications, hosting websites, processing large data sets, or performing scientific calculations.
We have several types of EC2 instances, but I will be using t2.micro, since my app is basic and I don't want to be charged for this :D
Instance:
    Type: "AWS::EC2::Instance"
    Properties:
      InstanceType: t2.micro
      ImageId: ami-00c39f71452c08778
      KeyName: !Ref KeyName
      Tags:
        - Key: Name
          Value: EC2byCloudFormation
      NetworkInterfaces:
        - AssociatePublicIpAddress: "true"
          DeviceIndex: "0"
          GroupSet:
            - Ref: InstanceSecurityGroup
          SubnetId: !Ref Subnet1
      UserData:
        Fn::Base64: !Sub |
          #!/bin/bash
          # Update the package manager
          sudo yum update -y
          # Install Git
          sudo yum install -y git
          # Install Node.js LTS
          sudo yum install -y nodejs
          # Install PM2
          npm i -g pm2
          # Clone the Git repository
          git clone https://github.com/jonathangaldino/simple-node-api /home/ec2-user/app
          # Install dependencies
          cd /home/ec2-user/app
          npm install
          # Run the app
          sudo pm2 start server.js
Here, we are creating an EC2 instance, providing a bunch of properties. You can read more about this in the documentation that AWS provides.
We are specifying the AMI image id, which in this case is a popular image created by AWS itself (also available on the free plan). The KeyName specifies the KeyPair we can use to access the instance through SSH (useful if you want to double-check a config in the instance).
UserData is a property that allows you to run a script (has some limitations - but our case is simple). The UserData runs only at instance launch, which makes it perfect for installing some dependencies. I'm using it to download git, node, pm2, and clone the repository.
I am also defining the network and how it will behave. In this case, I want the EC2 to be publicly accessed am I am attaching it to an EC2 Security Group and to the Subnet. I'll explain those right away.
The network rules of our EC2 Instance - SG
The resource AWS::EC2::SecurityGroup is what tells what can go in and out of our EC2 instance. With this resource, you define which ports and to whom they are available. Right now, you have to pay attention, from what I learned, a bad-defined SG can create a lot of problems.
InstanceSecurityGroup:
    Type: "AWS::EC2::SecurityGroup"
    Properties:
      GroupDescription: Security group for EC2 instance
      SecurityGroupIngress:
        - IpProtocol: tcp
          FromPort: 1337
          ToPort: 1337
          CidrIp: 0.0.0.0/0
        - IpProtocol: tcp
          FromPort: 22
          ToPort: 22
          CidrIp: 0.0.0.0/0
      VpcId: !Ref VPC
I'll be defining an SG with the following rules. It's always nice to put a description to it. You will thank me later. The property SecurityGroupIngress is an inbound rule that permits instances to receive traffic from the specified IPv4 or IPv6 CIDR address range.
This config will help you debug your instance. But is not required or nice for production. I was using SSH to take a look at the instance and double-check if my UserData script was right. After you deploy an AWS Load Balancer to forward traffic to this instance, you won't need to open the 1337 port as well. Things will be defined in other resources. Specifying a CidrIp: 0.0.0.0/0 tells that EVERYONE can access that port: which is not what we want ;)
My point is: Use this for debugging, not production. Make sure to remove that later.
In the end, I'm adding this SG to a VPC. I'll be talking about that later, on the Network topic.
The network around your app
When you create an EC2 instance, it will attach it to a VPC and Subnet. In my case, I had my EC2 instance attached to a default Subnet that doesn't have a public address configured to it. I don't know for sure if that happens with everyone or just me.
That's why I had to create a whole VPC around my app. In the following sections, I'll be sharing with you exactly what I had to create.
The Virtual Private Cloud (VPC)
The name tells everything. This is how you own & take control of a private and isolated section of the AWS Cloud just for your app. You can manage subnets, configure routing, gateways, firewalls, and more.
Parameters:
  CidrBlockForVPC:
    Default: 10.0.0.0/16
    Description: CidrBlockForVPC
    Type: String

Resources:
  VPC:
    Type: "AWS::EC2::VPC"
    Properties:
      CidrBlock: !Ref CidrBlockForVPC
The Subnet
A subnet is a range of IP addresses within a VPC that can be used to isolate resources and control traffic flow between different parts of a VPC.
We're going to define a range of IP addresses and one of these IPs are going to be used (locally) by our EC2::Instance.
Resources:
    Subnet:
        Type: "AWS::EC2::Subnet"
        Properties:
          VpcId: !Ref VPC
          CidrBlock: "10.0.1.0/24"
          AvailabilityZone: us-east-1a
          Tags:
            - Key: Name
              Value: Subnet
But what about our EC2 Instance? How it will be able to get an IP inside this subnet? By creating a NetworkInterface and assigning it to the VPC and Subnet.
NetworkInterfaces:
        - AssociatePublicIpAddress: "true" # will take a public ip address
          DeviceIndex: "0" # main device of the instance (can have more)
          GroupSet:
            - Ref: InstanceSecurityGroup # network rules
          SubnetId: !Ref Subnet1 # subnet that will take a local ip/network
Exposing the VPC to the Internet
If your intentions are hosting a web application, you will receive traffic from outside of the VPC, which means: your VPC must be exposed to the world (a.k.a. internet). The Internet Gateway resource enables the communication between instances in your VPC and the Internet, and you can use it in CF through AWS::EC2::InternetGateway. However, you will need a secondary resource to attach it to your VPC.
Resources:
  InternetGateway:
    Type: AWS::EC2::InternetGateway

  VPCGatewayAttachment:
    Type: AWS::EC2::VPCGatewayAttachment
    Properties:
      VpcId: !Ref VPC
      InternetGatewayId: !Ref InternetGateway
However, this is not enough. This will create a connection between the VPC and the Internet, but we need more resources. When you connect a Subnet to the Internet, through an Internet Gateway, it requires a Route Table.
Resources:
  RouteTable:
    Type: "AWS::EC2::RouteTable"
    Properties:
      VpcId: !Ref VPC
      Tags:
        - Key: Name
          Value: CFRouteTable

  Route:
    Type: "AWS::EC2::Route"
    DependsOn: "VPCGatewayAttachment"
    Properties:
      RouteTableId: !Ref RouteTable
      DestinationCidrBlock: "0.0.0.0/0"
      GatewayId: !Ref InternetGateway
A Route Table allows you to define how traffic is routed within a VPC and to external networks, including the Internet and that's exactly what the above part of the template does. It ensures that traffic to the internet from the resources in our VPC is properly routed. In other words: our EC2 Instance is able to reach the internet through this route definition.
Now, we just need to attach it to our Subnet, with the same goal as before, but now for the resources in the subnet.
Resources:
    MySubnetRouteTableAssociation:
        Type: "AWS::EC2::SubnetRouteTableAssociation"
        Properties:
          SubnetId: !Ref Subnet
          RouteTableId: !Ref RouteTable
That's it. Our template is finally done.
Deployment
KeyPair
KeyPair is a resource that allows you to connect to your EC2 Instances. You can create them through the console or using AWS CLI. Either way, it's good to generate one and attach it to your instance.
$ aws ec2 create-key-pair --key-name my-key-pair --query 'KeyMaterial' --output text > my-key-pair.pem
This is how you can create one key pair. Make sure to give the proper permission to the file:
$ chmod 400 my-key-pair.pem
AWS CLI Deployment
I will be using the AWS CLI to deploy my Cloudformation template. Feel free to use the console as well, it works the same.
$ aws cloudformation deploy --template-file=no-lb-template.yml --stack-name=my-nodejs-app --parameter-overrides KeyName=my-key-pair
This will deploy your template to AWS CloudFormation. On the console, you check your stack events.

To quickly grab your instance IP, go to "Outputs" tab and you will have it.

Checking the published app
With the instance IP address in hand, I can just access the :1337 port and it will hit my app.
Of course, we don't have an SSL certificate attached to our Instance but, that's a job for another day 🚀
Last but not least
This is the basics. If you have any kind of improvement, feel free to put it in the comments below or even open an Issue on the GitHub repo.
Any feedback is appreciated.